So today in class we had a tutorial on ho to create a Triptych template in Photoshop.
Here is how we did it:
Step One: First of all I opened all three images I wanted to include in the triptych ensuring all images pixel dimensions are the same. This is done by going to Image > Image size
Step two:
I then created a new template, named it window, adjusted the canvas size to 6x9in, 250 pixels/inch background white.
I created a new page with the above settings.
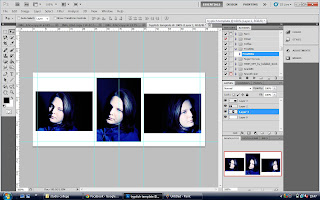
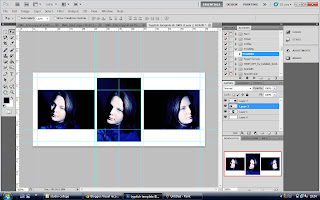
Step Three: Once my layer is open I make sure my guide ruler is on and snap tool is checked also. This was to enable me to snap a few guides onto my template to ensure the three images were going to be positioned correctly
Step Four: I then begin to drag my images across to my triptych template.(left click and drag)
I then move the images around to where I would like them then start to snap the ruler guidelines to ensure the images all align and are positioned correctly. This is were the snap tool comes in useful!
 |
| BEFORE |
 |
| AFTER |
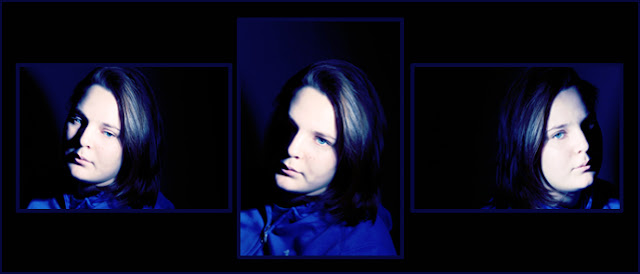
Step Five: Once the images are in position you can adjust the background colour to whatever you like (I tend to use a shot of the surrounding landscape if I'm shooting on location) in this case I opted for a black.
Step six: To highlight the frame of the images I add a stroke line to each frame in blue. This is how:
Merge all visable layers > select the area you wish to frame with the
rectangular marquee tool (this is why the guides have not been removed yet) > Edit > Stroke > Then add the thickness by size of pixels, I go for 4 as I only want a fine line > OK > Hide all the guides by selecting "View" from the top menu bar, followed by "Show" and "Guides." This hides all the guides.
 |
| Voila |
I want to save this Triptych as a template as you never know when it will come in handy. Here is how:
Step one: once the final image has been saved, duplicate layer, on that layer select the frame with
RMTool again and right click and fill with colour. Do this to all three frames and it will look something like this.
Step two:
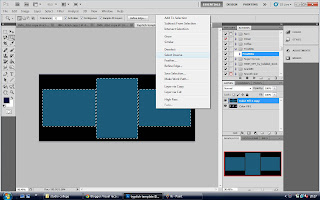
Now on that top layer select the magic wand tool, highlight all boxes and inverse (see below image)

Hit delete and remove the background layer and this is your template:
To use this template over and over you simply drag and drop your images behind and adjust as needed with free transform.
NB: Try to stick to the rule that applies right at the beginning of this tutorial Ensure you images your transferring across are of the same size/pixels.


